How to Make Homemade Lamps: Wax Lava, Bottle, Square Shade, and Rainwater
Illuminate your space with unique, handmade lamps that not only brighten your room but also reflect your creativity. Crafting homemade lamps is a delightful endeavor, offering a chance to personalize your lighting fixtures. In this guide, we’ll explore step-by-step instructions for creating five distinct types of homemade lamps: Wax Lava, Bottle, Square Shade, and Rainwater. Let’s embark on a journey of creativity and light up your living space with these DIY lamp projects.

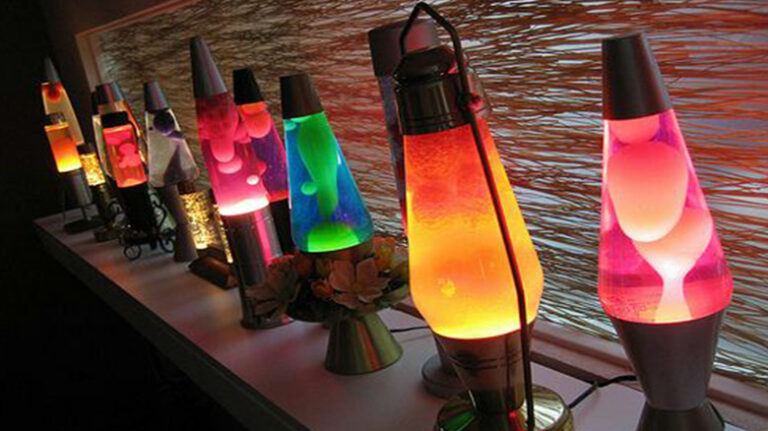
How To Make A Wax Lava Lamp | Make Different Colors of Lamps at Home
If you’ve ever wanted to make your own lava lamp using wax, but don’t know how to make a wax lava lamp and thought that it was too complicated or expensive, then this guide will help. Here, all you need is some wax, oil, and dye. We’ll walk you through each step of making a homemade version of these classic lamps so that even if you’re not good at following instructions, your friends won’t know what’s happening behind closed doors!

Step-by-Step Guide To Make A Wax Lava Lamp
You can make a lava lamp out of some simple ingredients. All you need is wax, oil, water, salt, and a bottle. The most important part of making a lava lamp out of these simple ingredients is that it should be made from an old glass bottle. You can use any type of dye but only use food-safe dyes for your bottles, as these are safer than other types. Then, follow the below steps.
Step 1: Mix Wax And Oil
- First, you’ll need to mix the right amount of each ingredient. The ratio should be one tablespoon of beeswax with one cup of olive oil canola or coconut in a saucepan over low heat.
- If you’re using an electric stovetop or microwave, simply warm up your mixture until it becomes liquid before adding more ingredients like water or alcohol. If not, then heat up more slowly so that it doesn’t burn off too much moisture from what has been added already. You should also add some liquid help by adding water if necessary.

Step 2: Add Dye
- In this step, you’ll add some dye to the wax and watch it take on a different color. You can use any color dye that’s available in your local craft store, but we recommend using something with a high concentration of pigment in it.
- How much dye should you use? The amount of dye you add depends on how much light is shining through the lamp. If there isn’t much light coming through at all or if there are no colored lights shining through, then simply use 0% concentration. On the other hand, when there are lots of ambient light coming through and/or colored lights twinkling around inside the lamp itself, go with 20%.
- Apply one layer at an angle across all four sides of your container so that they’re evenly covered by wax from top to bottom. And remember, these layers will be translucent when melted together later on.

Step 3: Fill The Bottle With Water
- The best way to fill the bottle with water is by using a funnel. But, you can also just pour the water into your hand and then drop it in.
- Make sure not to overfill the bottle or else you might have trouble getting out the wax later on. Don’t let water get into any of those things, like your candle or cork.

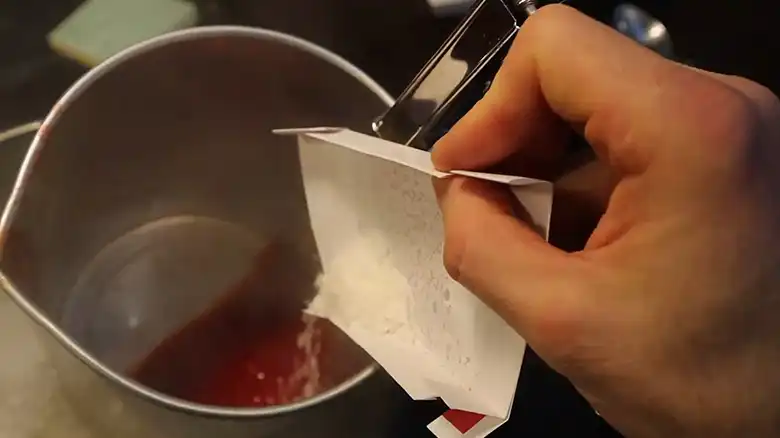
Step 4: Add Salt
- When you’re ready to add the salt, it’s important to make sure that your wax is at room temperature. If it’s too cold or hot, this will affect the way your wax melts and hardens.
- Next, add half a cup of table salt into a shallow dish and mix thoroughly with about one-fourth cup of warm water until all of the salt has dissolved completely in the water.
- Then pour this mixture over your cooled-down wicks and let them sit for 24 hours before starting on Step 5 below. Remember not to use completely melted wicks for this task.
Step 5: Put In The Cork And Light The Lamp
- Now, pour the wax into your jar, making sure to leave enough room at the top for air bubbles.
- Use a stick or spoon to stir up any remaining lumps of wax as they float to the surface of your lava lamp.
- Once you have poured in all the wax and removed any loose chunks, let it sit for about an hour so that it can begin to warm up and liquefy slightly before adding more fuel.
- This step is vital because it will allow us to produce some nice flames from within our lava lamps without having too much heat output from our candles themselves, which would lead them to combust.
- You can cut off about halfway through this process if possible. Otherwise, just keep stirring until it’s time for lighting.

Can You Make A Lava Lamp With Candle Wax?
Yes, you can make a lava lamp with candle wax. It takes a little more effort and planning, but it is possible.
- The first thing that you need to do is get some wax that you know is safe to use in candles. You should be able to buy this at any craft store or online.
- Next, you will need a jar with a lid. This can be anything from a small glass jar to a large canning jar or something similar. The important thing here is that it has an airtight lid like one for canned goods so that the wax does not evaporate too quickly when you start playing with your new creation.
- You will also need some water, dish soap, and food coloring if you want your lava lamp to have different colors when it cools down. When you do not wish to have different colors though, leave out the food coloring and just add water instead of dish soap next time.
What Kind Of Wax Is Used For Lava Lamps?
Waxes on lava lamps are petroleum-derived products, meaning they are derived from crude oil. The most common wax used in the manufacture of lava lamps is paraffin wax, which is also used in many other products, such as candles.
Paraffin wax can be white or colored. White paraffin wax is used in the manufacture of these lamps because it has a higher melting point than colored paraffin wax, which makes it easier to pour into molds and produce lamps with intricate designs.
How To Make A Wax Sink In A Lava Lamp?
If you want to make a wax sink in a lava lamp, you must have the right equipment. You will need a large spoon and two smaller spoons. You can also use an old paintbrush if it’s too big to fit into your lava lamp.
- First, add some melted wax to the bottom of your warmer using a large spoon. Once it has cooled down, place your small spoons upside down on top of it so that they create a triangle shape.
- Once they are in place, cover them with wax using the paintbrush or other tool that you used to melt the wax. At this point, you need to place more melted wax on top of your triangle if required.
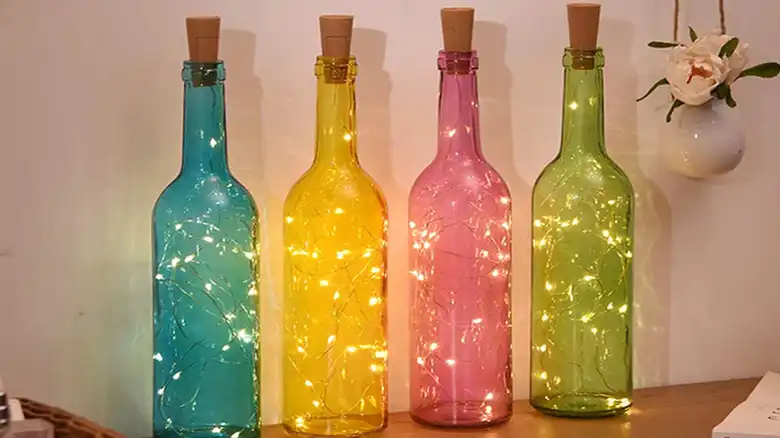
How To Make A Bottle Lamp Without Drilling? Glowing DIY Crafts
There’s something about turning bottles into lamps that just makes us happy. It’s sweet, it’s nostalgic, and it’s a great way to repurpose old bottles! Similarly, you can transform a bottle into an elegant-looking lamp for your room. This article will show you how to make a bottle lamp without drilling a hole in your precious vintage glassware.
How Do You Make A Bottle Lamp Without Drilling?
There are many ways that you can turn bottles into lamps without the need to drill a hole in them. One of the easiest ways is by using string or fishing lines, which can be found in any hardware store. You need to experiment with different sizes of strings until you find one that works best for your needs.
Another option is melting down part of an empty wine bottle or anything else around so that it forms an edge for your lamp base. If you do this, make sure not to let too much heat escape from under where your melted material ends because otherwise, it might catch fire. In any way, follow the instructions below to make a bottle lamp without drilling.
1. Insert String Or Fishing Line
The first step to making your own bottle lamp is inserting a piece of string or fishing line into the bottle. Tie it to the bottle, then use a glue gun to secure it. You can also use hot glue if you want to make sure that everything is safe and secure once it’s done drying.

2. Melt The Bottom
Melt the bottom of a glass bottle to create a flat edge.
A lighter is an easier option for melting than iron because it doesn’t get as hot, and you can use it on glass with more ease than metal. We recommend using some sort of protective hand guard like oven mitts when using any type of heat source during this process.

3. Create A Flat Bottle Edge
If you want to make sure the melted edge is completely flat, you can stick it on a flat piece of metal.
- Use a hammer and/or another tool to flatten the bottle.
- Take care not to damage the bottle or break any parts of it off while doing this step.
- Make sure that all sides are completely flat so that when they cool down again, they’ll be smooth enough for gluing.

4. Flatten And Smooth Out The Melted Edge
- Use sandpaper to flatten and smooth out the melted edge. Now that you have a nice smooth edge, you can start working on your bottle lampshade.
- First, take some fine-grade sandpaper and use a circular motion to smooth out any remaining burrs from your melted edge before applying glue or hot glue.
- If you find yourself having trouble getting rid of those last bits of metal filing left over from cutting off your edges with an angle grinder, try using a sanding block between each pass rather than just using direct pressure against it. This will help prevent further damage to your piece while also making sure that all areas get smoothed out evenly instead of just focusing on one area at a time as normal sandpaper would do otherwise.
5. Add Some Adhesive
Use a hot glue gun and add a special bottle glue or epoxy glue to prevent the lamp from falling off the bottle. You can use special silicone glue for the best result.
6. Give a Finishing Touch To The Bottle Lamp
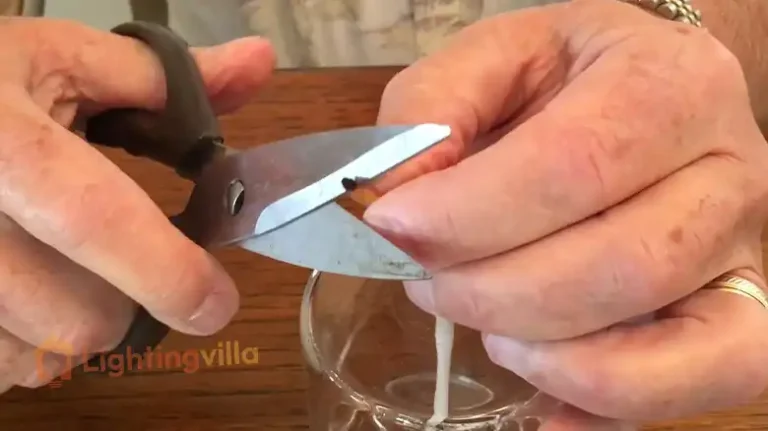
Use an empty glass bottle as a tea light holder by using scissors or a wire cutter to cut off the top and add some glitter inside for a warm glow and sparkle. Now, to finish making the bottle lamp, you’ll need:
- Wire cutter
- Glue gun (or hot glue)
After arranging these things, follow the below process.
1. Use your wire cutter to cut off the top of the glass bottle. You can also use scissors.
2. Add some glitter inside and close it back up again with those same tools (wire cutter or scissors).
3. Now, you’ve got the bottle lamp done, and hopefully, it will hold things together, so they don’t fall apart so soon.
How To Make A DIY Lamp From A Jar?
The process is simple, and you can use any jar with a screw-on lid. You’ll just need some lightbulbs and plastic sheets.
- Cut the plastic sheets in half, place them on top of each other, and then cut them into pieces. This will be your shade.
- Now take two jars and put them together to create a stand. Make sure that they are not too wide apart. Otherwise, it can be hard to adjust the lightbulbs.
- Fill one half of the jar with sand or small pebbles so that it fits tightly against the other half with no gaps between them.
- Place the second half of your jar on top so that there is space for the bulb and socket at the bottom of your lampshade. Use glue if necessary to secure it in place and make sure that there are no gaps at all between the two halves of your lampshade.
How Can I Light A Bottle Lamp Without Drilling?
The easiest way to light a bottle lamp is with a small LED or LED bulb. If you don’t want to drill, try using a light kit that can be bought at a hardware store. You’ll also need an adapter and wire to connect the kit to your existing fixture.
How To Make A Bottle Lamp Easy?
Making a bottle lamp is pretty easy when you have a few bottles and some old T-shirts. Make a lamp using a light bulb, as we’ve mentioned in this article. You can make it as big as you want, but we recommend that you keep it small. Because the light source for these lamps is usually pretty low. Use the t-shirts to make the shades and finish making the bottle lamp.
How To Make A Glass Bottle Into A Lamp?
You can use a big glass bottle to create a lamp. If it is not large enough, you can just cut the top off and make it smaller. When you want to make an oil lamp from a smaller bottle, add some kind of fuel inside it. You can also use the bottom part of your bottle as the base for your new lamp. To make a light lamp, use bulbs and wiring connections in the bottle.
How to Make a Square Lamp Shade? Pro-tips
Lampshades may be a lovely addition to your home’s design because lighting is a significant component in setting the ambiance for your rooms. By choosing a different form, you may produce a distinctive appearance depending on the design of the lamp and the shade. You may make your shade to suit your tastes and the interior decor of your house by choosing from various forms, sizes, colors, and textures readily available in home improvement or lighting stores.
We’ll show you how to create an exact square shade using some everyday things in our DIY post on creating square lampshades today.

Manufacturing drum lamp shades, or those having a circular or round form, involves a somewhat different procedure than constructing lampshades in a geometric design with straight edges (such as square, rectangle, and triangular shapes).
How to Make a Square Lamp Shade – Follow the Steps Below
Square lampshades require a wire lampshade frame rather than a straightforward cylinder construction for the shade. Styrene glue and fabric or paper are used to create individual panels, which are then attached to the frame with adhesive and screws. Additionally, you may utilize several prints and patterns on your panel lampshade, using various material covers on each side.
Despite the added complexity, the panel lampshade in a square form might be the ideal accent for your lamp base. The basic steps for making a straight-sided lampshade are described below:
Steps
- The designs and widths of panel-style lampshade frames are varied. This method works best with lampshade frames that have straight sides (no curves). Learn to assess the lamp to discover the ideal-sized lampshade if you’re unclear about what size shade you’ll need to do so.
- The size of the lamp shade frame’s respective sides may vary somewhat. Create a sheet of adhesive styrene by tracing it and then cutting it out. To remember which styrene panel fits which side, use sticky notes.
- You may use almost any type of fabric or beautiful paper to create a DIY lampshade with a fully unique appearance. Each Sticky Styrene sheet should be peeled off and adhered to the back of the material of your choice. After being reduced in size, use specialized lampshade glue to attach the styrene screens to the frame.
- The lampshade is now complete, but the sides still appear rough. To finish the effect, put a few slender strands of velvet ribbons or other trim here. You can use velvet trim that matches the tone overall or choose a contrasting color.
- To hide the grosgrain ribbon and visually bind everything together, you might trim the top and bottom of the framing with the same velvet or other material. Specialty lampshade adhesive dries rapidly, so in less than one hour, the shade will be completely dried and ready to use!
What Kind of Paper Is Used for Lampshades?
In 1879, when inventors created the first incandescent light bulb, people used paper shades to diffuse the light and shield their eyes from its glaring intensity. Lampshades have evolved significantly throughout time, moving away from paper and toward more resilient and flame-resistant materials.
But paper is still a great material to make a lampshade today. You may pick from various hues, designs, and materials. Making your lampshade at home is possible using a variety of paper kinds, including wrapping paper, cardboard, wallpapers, maps, textbook pages, periodicals, rice paper, transparent vellum paper, newspaper, kraft paper, and many more.
Additionally, you may guarantee that your paper shade is strong and flame-resistant by utilizing a solid sheet of sticky styrene as the inner lampshade material.
Why does my paper lampshade require a sticky styrene backing?
A rigid foundation for your lampshade is provided by adhesive styrene, a thin, transparent polystyrene sheet that is strong and long-lasting. This is the material used to line the lampshade, which gives it durability and maintains its good condition over time. Additionally, it turns the paper lampshade flame-resistant, allowing you to use it safely, even using bulbs with greater power.
What supplies are suitable for making a lampshade?
Every lampshade needs a strong foundation or structure to hold it in place, at least at the top. Fabric, plastic, paper, and metal are used as shade materials.
If I did not have a lampshade, what could I use?
Make a Lampshade Out of an Old Sweater. You can transform any worn-out item of clothing or fabric into a lampshade. Look through your closet to see if there are any sweaters or stockings you want to donate; if so, think about making a lampshade.
How to sew a rectangular fabric lampshade?
Apply a thin, 2-inch-long line of adhesive to the lampshade frame’s interior top edge. You should press the top 1/2 inch of the lampshade fabric over the frame and into the hot glue. Place the top cut piece of the fabric against the frame, close to the unfolded side edge.
Can I make a lampshade out of any material?
As long as it’s woven and not stretchable, anything goes when it comes to fabric. Still, it’s always a good idea to consider how many lamps the lampshade will reflect, particularly when using a relatively thick fabric like wool or tweed.
How to Make a Rain Lamp? Follow Step-by-Step
Rain lamps are beautiful works of art that evoke a sense of elegance and tranquillity in the environment. This article will teach us how rain lamps function, how to make them, maintain them, and more.
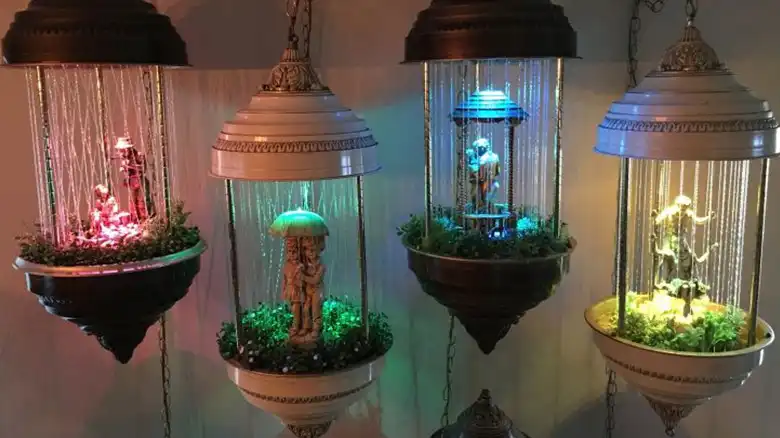
Rain lamps, sometimes mistaken for swag lamps, were decorative accents that were quite fashionable in the 1960s and 1970s. They fulfilled the same function as lava lamps. If you do get one, it will usually be an antique because they are so uncommon and precious to collectors. Let’s examine some further details about this lovely object.
Rain Lamp: The Basics
Although there were many other rain lamps, the most typical ones often featured a metal top and base. Through which a net of fishing line filaments was tightly strung. The lights came in stunning colors of gold or silver, and the holders often included three metal rods to support the lamp’s construction. Rain lamp could or might not have featured a sculpture, often of Aphrodite, encircled by artificial leafy flora.
There was a likelihood that the lamp had electric lighting. The oil-based rain lamps featured an electric pump built into the base that pumped oil over the filament, giving the appearance of slow-moving rain.
How To Make A Rain Lamp?
An excellent rain lamp could be expensive to purchase due to its rarity and the difficulty in finding one. Anyone can create a lovely oil rain lamp with a little imagination and the appropriate supplies and equipment.
Items Necessary:
- Two metal jars (with screw-on lids)
- One hook and bolt (with a compatible nut)
- Three metal pipes (width depends on the length of the lamp)
- Metal epoxy glue, one (strong grade)
- One knockout or stun punch (for creating holes in metal)
- Strips of metal flashing
- Paints (select as many colors as you want to paint your lamp with)
- Fishing lines (thin)
- Washers (rubber/plastic)
- one tank pump (with or without lighting)
- Carvings or plants (depending on your creativity)
- mineral oil
- Adhesive (liquid)
- pliable rubber or plastic tubes
- One electric drill
Step One:
You must first gather the components needed to assemble the oil rain lamp. Furthermore, cut a few tiny holes just within the metal jar’s screw-on lids with the drill. Make as many openings as the number of strings you desire for the lamp since they will be used to attach the fishing line filament. The symmetrical drilling of the openings on both lids will make the preparation of the lamp considerably simpler for you.
Then, at the base of one of the jars, create a bigger center hole that can accommodate the hook and bolt. The screw and metal epoxy glue secure the hook and screw to the jar. The hook is needed to hold the lamp, and this jar will serve as its top.
Step Two:
Create three equilateral triangle-shaped holes in each lid that are the same width as the metal pipes. Check to see that the holes on both lids are identical.
Use a punch to cut a hole in the middle of the lid’s upper jar if you want to include a bulb in the oil rain lamp. To make the light bulb only faintly visible, adhere the bulb to the opening inside the lid. To preserve the light from any oil leaks, you will also need to connect the metallic flashing strips to the light using metal epoxy.
You must drill a hole on the bottom jar’s side to provide room for the oil pump’s power line. Attach the steel pipe end to the top of the lid using metal adhesive glue.
Step Three:
It’s time for you to color the jars, caps, and tubes as you choose. Ideally, golden or silver paints are wonderful options for achieving a vintage impression. Before proceeding to the following step, allow the paint to dry fully.
Step Four:
Next, insert the fishing line through the openings. A mesh of the fishing line will eventually form as you move from bottom to top or vice versa. To prevent the string from slipping out again, ensure the line is tight between all the holes and secure the ends with washers.
One of the steel pipes should have the power wire for the pumping and light inserted through it from top to bottom. Make sure the bendable pipe used during the pump’s discharge is securely fastened, then put the open end of the tube into a lower metal pipe. You may now secure the upper jar’s lid to it.
In the opening at the side of the bottom jar, insert the pump’s electrical wire. To stop oil leaks, plug the opening with some metal flash strips and metal epoxy.
Step Five:
You should add mineral or paraffin oil to the jar until the pump is completely immersed.
Now, gently glue down all the sculptures, greenery, and other ornamental elements without messing up the threads to complete the finishing touches.
Step Six:
Our oil rain lamp is nearly complete. To get the light going, hang it and switch on the power supply. To get the fluids to run at the desired speed.
A Quick Tip on Rain Lamp Oil
When you fill oil into the lamp, make sure you use only mineral oil or paraffin oil, as other types can get rancid very soon, or they may stop the pump from functioning correctly.
How does a rain oil lampwork?
A statue of the goddess Venus encircled by flowers is occasionally found in the middle, encircled by a web of fishing lines. Oil is pumped up to the lamp’s top by the engine, which flows through tiny holes in the web of fishing lines to simulate rain or snow falling.
What oil is used in rain lamps?
Although paraffin oil is also known to perform well and can be obtained at hardware stores, crafting stores, and large retailers, mineral oil is more practical because it is economical and accessible at most pharmacy stores.
How much oil goes in a rain lamp?
Expect to pour no more than 3 quarts of oil but at minimum one quart. Once the raining effect appears to be normal, stop adding oil. Use moderate amounts of oil to avoid overloading the pump.
Final Speech
Crafting homemade lamps allows you to infuse your living space with unique, handcrafted brilliance. Whether you’re drawn to the mesmerizing movements of wax, the upcycled charm of a bottle lamp, the modern appeal of a square shade, or the natural allure of a rainwater-lit vessel, these DIY lamps offer a delightful blend of creativity and functionality. Illuminate your surroundings with a touch of your own ingenuity, and let these homemade lamps become shining testaments to your crafting prowess.