How To Install Brick Lights? Guide for Outdoor Lighting
A fantastic option to add more ambiance and create the ideal environment for your house and garden is outdoor brick lighting. But if you’ve never done it before, it can be a little challenging.
Any lighting fixture’s wiring has to be contained within an electrical box, concealed inside a regular wall. However, it is typically not possible to drill a hole for an electrical box in bricks; if it were, there would still be the issue of how to route the wires. Let us see all there is to know for a simple yet efficient installation of brick lights for your home.
How To Install Brick Lights | Pro-tips
Mecks Home suggests two remedies. One is to install lighting and electrical in surface-mount ducts and boxes. The alternative is to make a hole in the wall so that you may install the containers on the opposite side and route the wire through it.
Things You Will Need
Here is a list of things you’ll need to install a brick light on your walls. Better to note them with you in the hardware store, so you don’t get a hard time.
- Drilling Sets
- Masonry Pieces That Are 1/2 Inch And Lower
- Box Electrical
- Anchors For Conical Screws
- Hammer
- Sizing Caulk
- Electrical Cable
- Electric Box Lid
- Conduit For Electricity
- Elbow In A 90° Angle
- Hose Clamps
Wires Running Behind the Wall
1. Decide where you want the fixture to go, then use a masonry bit to bore a 1/2-inch drill inside the wall.
2. Make a hole through the rear of an electrical box and into the brick. Then, attach the electrical box to the frame behind the wall. The top of the container needs to be level with the wall’s surface.
3. Place the light you wish to put over the hole and turn it in the most comfortable direction. You should mark the bolt holes on the bottom of the fixture on the brick before you remove the light.
4. On each marking, use a masonry set to make a hole in the wall. Then, insert a conical silicone hook through each hole. After threading the cables thru the center hole and driving screws into anchors to secure the installation to the wall, replace the light fitting. Apply silicone caulk around the fixture’s base.
5. Connect the electrical box to the power supply by running cables. Connect wires inside the box after turning off the power. Put a detachable plate over the box after the wiring is finished.
Utilizing Wiring Components Mounted on the Surface
1. Place a surface-mount box against the wall where the fixture will go, then mark the locations of the holes on the rear.
2. Take away the box, then use a masonry bit to bore a hole through each marking on the wall. Reinstall the box, insert a conical screw anchor through each socket, and fasten it to the wall with screws into each anchor.
3. Using a mallet and screwdriver, make a hole in the sides of the box for the wiring. Create a length of tubing that runs from the box to the closest location where you may access the wires; this location could be close to the floor, the ceilings, a doorway, or windows.
4. Insert wire into the electrical panel thru the conduits, and then use a screw-on connection to secure the line. Put a fitting at the opposite end of the tube to finish it off. It frequently works to extend a 90-degree elbow on a wall opening.
5. Use pipe clamps to affix the tubing to the walls. Drill holes, insert anchors, then secure the clamp by pushing screws.
6. Attach the mounting bar that was package included with the light fixture. Before screwing the fixture to the bar, attach the circuit cables to the fixture’s wiring. Before fastening the fixture to the anchoring bar, if it is an outside fixture, you should probably place a waterproof gasket all around the fixture.
Tips and Warnings on Installing Brick Lights
To flush-mount a light, if there is no framework behind the walls, you will need to carve out a space for the electrical outlet. Use an electrical renovation box when you decide to do this. It doesn’t have the same depth as a typical rough-in box.
While feasible, bore holes into the mortar instead of the bricks themselves when working with an ancient brick wall. Drilling into old bricks often results in their breaking and deterioration.
Attaching String Lights To Brick
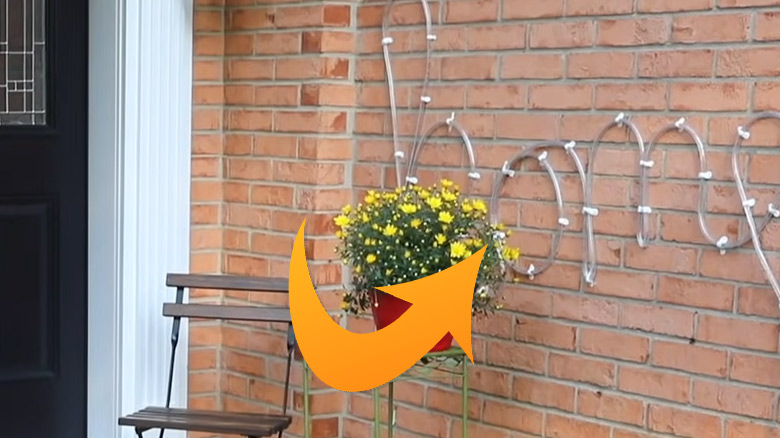
Depending on where you’re putting the lights, there are many ways to attach backyard string lights. It’s simple to install lights if you wish to mount them to a wall. Try installing a cup hook, bore a hole in your wall, wrap the light over it, and zip-tie it. Ensure that a power outlet is accessible and nearby. The posts of the porch or deck, your house, fencing, treehouses, patios, or pavilions may all be used to hang string lights.
Thread the heavier lights or long strings of lights thru a guide wire for further stability while mounting them. For additional strength, wall anchors can be installed well before hooks.
Holding Up String Lights
To install the string lights safely, you have a variety of alternatives.
- Cup hook or a C hook
- Q hook
- Hooks, J
- Cord Clamps
This hardware is available at your neighborhood Walmart or Home Depot. The hanging hardware may be included with some string lights.
Frequently Asked Questions
How To Install A Brick Light Fixture?
On every marking, use a masonry bit and make a hole in the wall. Then, insert a cylindrical plastic screw through each hole after threading the cables through the center hole and driving screws into the hooks to secure the light to the wall. Apply rubber caulk all the way all around the fixture.
Does An Exterior Light Need A Box?
Since most outdoor lights are connected to low-voltage circuits, junction boxes are not often required. You won’t need to consider it until you have outside wall lights hooked into your normal voltage circuit.
Conclusion
The last thing you desire if you have a contemporary garden design is large outdoor lighting to spoil the aesthetic and blind your visitors while you enjoy little al fresco eating. Instead, a subtle lighting accent blended into the yard finish is excellent, which is why brick lights are a wise decision.
The cables may be buried behind the wall or beneath the floor, giving a seamless finish that doesn’t interfere with the intended design. Such wires are disguised inside the walls or patios, ensuring they fit flat with other bricks, wood, or concrete.