[Easy Installation Guide] How to Install European Light Fixture?
It is essential to be careful and attentive while installing a new European light fixture in your home. There is no excuse for error when it comes to electrical wiring equipment. So, you need to organize the whole task properly and learn the rules and regulations to ensure the project is up to code and safe.
It can be a hassle if you don’t know how to install a European light fixture. But knowing the whole procedure, you can install a new European fixture, so learn the project and install wiring to light the home safely.

How Can You Install Your European Light Fixture in the Best Way?
Following some steps to install a European light fixture in your home is crucial. Since it is an electrical project, you need to take proper safety before implementing the projects, and then you must start working. Here I’ll describe some crucial steps to help you install the light fixture smartly and easily. So, let’s get started.
Before starting the task, let’s look at the essential things to do the work.
- European Light Fixture
- Sheetrock saw
- Ladder
- Lineman pliers
- Wirenut assortment
- Assorted screwdrivers
- Fish or snake tape
- NM type cable as ROMEX
- Switch boxes
- Fasteners
- Switches
- Putty Knife or scraper
- Spackle or any patching compound
- Bits and drills
Part 1: Planning Your Project
Step 1: Verifying Local Wiring Codes and Scheduling Inspections: It is necessary to check the local wiring code and schedule inspections. So, you need several inspections and permits for most residential construction projects. However, you need some inspections and permits when you want to replace or install new wires.
Moreover, it is crucial to ensure you’re up to code. So, you may be required to schedule a temporary Service Inspection, Rough-in inspection, and Final inspection with your housing administration in the city or country where you live. Again, even if you are not doing the task yourself, inspecting a subcontractor, such as external wood-fired furnaces or well pumps, is essential.

Step 2: Choosing the Bulb Types for the European Fixture: High-pressure sodium, LED, Mercury Vapor, and Halogen are popular with their unique color tones. However, the varieties and tones of bulbs can be expressed as a temperature in degrees Kelvin, where warm tones with yellow to red have lower temperatures at 2000 degrees. Contrary, the color tone has higher temperatures at 8300 degrees. You can use a 5300-degree temperature for your daylight.
Suppose you are confused about what types of bulb suit your European texture, so you should use LED lighting. Furthermore, LED lights don’t have high temperature, and it uses less energy, which decreases your costs. Again, it can last ten or more years and have different colors and various LED lights with brightness options.
However, going for a white warning bulb at 2700 degrees is okay when searching for more relaxing or intimate light. On the other hand, when you want a work light, choose daylight or cool white bulbs with 4000 degrees.
Moreover, you should remember that, when changing bulbs, you must obtain one with the same temperature bulb. Otherwise, your room can become warmer or cooler depending on the light source tone.
Especially your European light fixture equivalents are E14 and E27 bulb sockets. So, you can choose the E26 (us) bulb in your E27 socket. Again, you can use an American E26 bulb with your European E27 Socket. But remember that your European E14 bulb socket will not fit with American chandelier base bulbs as E12.

Step 3: Choosing the Right Power Source for Your Needs: Locating an appropriate power source is essential. So, search for an existing junction box. Also, you can search for a nearby outlet in your ceiling that is very close to the branch of your electrical panel. If you cannot find any appropriate power source, you must run a new branch from your electrical panel.

Step 4: Planning the Wiring Route for a New Installation: You have three options to wire your circuit for a new installation: the power to fixture and installing the power, power to installation, and load point at the same switch. However, you need to connect the three points, such as the European fixture, source, and switch, together with a simple two-wire Romex cable if you have only one switch controlling the fixture.
Moreover, if you wire multiple switches to your fixtures, you must separate the wiring systems to keep the wire straight. Furthermore, you must wire the European fixtures to each other with a two-wire cable. Again, wire your switches to each other with a three-wire cable.
However, you can bring the power source to either fixture boxes with two-wire cables or three-wire switch boxes. Though the cable between your European light fixture and switch is also a two-wire type, you need to run from either three-way switch box to your light fixture box with the power source. You should not be derivate from the requirement.
Part 2: Installing Your European Light Fixture

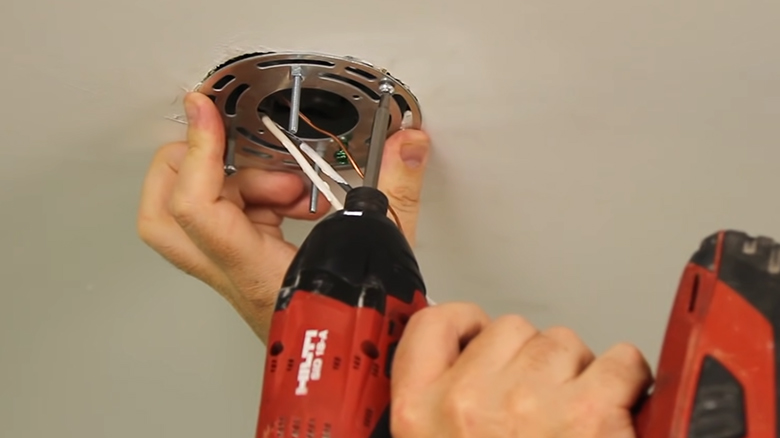
Step 1. Cutting Openings for Your Wiring: Now, you need to cut openings into your ceiling or wall surfaces for your switches, boxes, and the European fixture support by first tracing around your box on the ceiling or wall surface. You must match your switch height to the rest of the home.
Moreover, If you want to install your European light fixture in your ceiling, the box you need to use should be a 4-inch octagon. Besides, note that if you want to install a small light fixture, you must consider installing a fan-rated box.

Step 2. Cable and Romex Installation: You need to install any cable or Romex between the power source and boxes in the voids of your ceiling, wall, and floors with fish or snake tape.
However, determine if there is a huge ampacity in the circuit that can support the additional load of the extended wiring of the same size from your power source to the fixture and switch locations. When running a new circuit directly from your electrical panel, the new wire must be in exact size according to the circuit breaker or the fuse size.
Step 3. Verifying Wiring Requirements: Following National Electrical Code Requirements for wiring is important when installing a new fixture. So, if you select wire for the task, ensure it fits the requirements. You cannot use a wire smaller than 14 copper for power wiring because you can use small wires for low-voltage applications, including doorbells and buttons, zone and thermostat valves in oil and gas-fired heating systems, networking, telephones, etc. You cannot enter these wires into electrical panels.
You should not connect a 15 AMP fuse or circuit breaker with less than a #14 gauge copper wire because the manufacturer designs a 15 AMP fuse or circuit breaker to carry up to 12 AMP on a #14 copper wire. Again, you can carry international loads of up to 15 AMPs for up to several hours. If there are any device loads or appliances that are greater than 12 AMPs, you require a larger size circuit breaker and wire.
Again, you cannot connect a 20 AMP fuse or circuit with less than #12 gauge copper wire because the manufacturer designs a 20 AMP circuit to securely carry up to 16 AMPs in a #12 copper wire.
Important Note: You should always turn off your electricity before electrical work or opening electrical boxes. Besides, you must shut off power when connecting the new wiring to the existing wiring.
Frequently Asked Questions
What Types of Wires Go Together on a Light Fixture?
Firstly, you should test your new light fixture. Since every light fixture is different, you should use at least two wires that can come out of your fixture. However, you can use a black or hot wire and a white or neutral wire. Here you can have these two wires covered and conjoined with protective plastic.
Is It Possible to Install a Light Fixture Without a Technician?
Yes, why not? You can install a light fixture without an electrician or technician if you are that confident to do the work. With just 30 minutes, you can implement the task with some Basic tools. But in this case, you should have enough experience with your previous electrical work. If you lack confidence and experience, you should hire a licensed technician or electrician to install the light fixture.
How Do I Fix a European Light Fixture With the Wrong Wires?
When you connect the wrong wires to your European light fixture, the outlet will still be active, but the polarity cannot be backward. However, if you occur this incident, a lamp will have its bulb socket sleeve energized rather than your small tab inside the socket.
Conclusion
It is very simple to install a European light fixture in your home. But remember that you need to maintain safety while working with electrical equipment. You can have advantages from following the steps of this article and smartly handling the installation of the light fixture.


