
How To Remove Harp From Lamp? Do It Like A Pro
The harp is a beautiful decorative object that can be used to add some sophistication and style to any room. It’s also known as a ‘wand’ or ‘peacock feather.’ In the past, people actually used them to decorate ceilings and walls, but these days they’re mostly used for many decorative purposes. If you have one hanging on your lamp shade and want it off, here are some easy steps on how to remove the harp from a lamp.
How To Remove Harp From Your Lamp?
Check for damage before you start removing the harp. If you see any damage or wear on the inside of your lamp, please ask someone to help you remove it before proceeding with this step. Unplug your lamp and remove all wires from their respective sockets. Here, the black wire should be on top.
Then, remove all screws from the bottom of the base of the stand. After that, removing the harp from your lamp is now easy. Just follow these steps:
1. Take A Look At Your Lamp
If you have a lamp that uses a harp, take a look at your lamp. You will find the following:
A harp is a metal finial that screws into the socket of your socket-style light fixture. It hangs from wires and holds them in place for safety reasons. The purpose of this piece is to keep the electrical cord out of harm’s way and away from children.
Identically, a socket-style light fixture has two parts. One part is with four holes where an electrical cord goes through, and another is with five holes holding up shades or caps on top of lamps. As a result, they don’t fall down onto floors when turned off. So, identify the whole harp part from the lamp.
2. Determine The Harp Type
Determine if the harp is adjustable or non-adjustable. If your harps are non-adjustable, then they have one size and are secure in place so that they cannot be taken off easily. However, if they’re adjustable, then there will be several different sizes available for purchase.
Also, determine if the harp is a one-piece or two-piece design with screws. Two-piece designs tend to be sturdier than single pieces. Because, there aren’t any joints where parts come together at screw holes, which can become loose over time due to wear and tear from daily use of light fixtures.
3. Disconnect The Wire
Now, disconnect the wire from the switch and outlet cap. Unscrew all three wires from the bulb, lampshade, and base of your harp lamp.
As a rule of thumb, you can tell if a lamp has a non-adjustable harp by looking at the harp itself. If it’s just a flat piece of metal, it’s not adjustable. In the case of a non-adjustable harp, two screws hold it in place, and you’ll need to remove them before removing the harp itself.
4. Loosen The Harp Set Screw
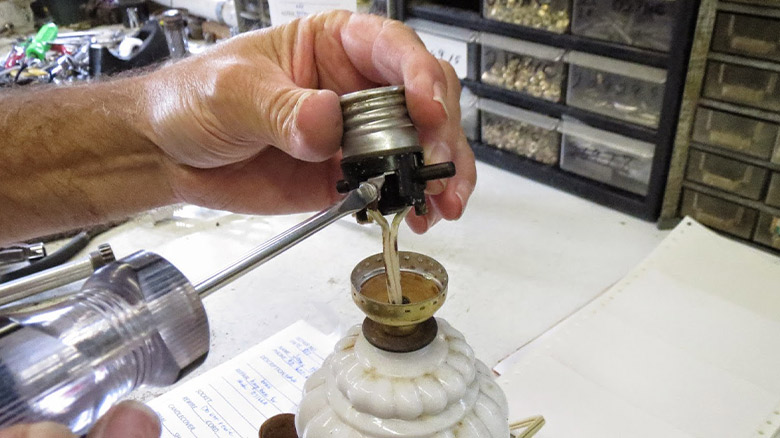
Use a screwdriver to loosen the set screw on your lamp’s harp. Don’t remove the set screw! If you do, it will become damaged and won’t work properly when you put it back in place later on, and we don’t want that. Just loosen it enough so that if someone were to bump into your lamp, they would not break something important inside of it.
5. Remove The Nut And Washer
To remove the nut and washer from the socket base, you’ll need to remove them from the harp. If you’ve ever removed a light socket from an electrical outlet, this should be familiar territory for you. It’s just like removing any other electrical part.
- First, use a Phillips-head screwdriver to loosen one of its four screws. These are usually located on either side of the socket itself.
- Then, unscrew them all until they’re completely loose.
- Once they’re out, push down on them with your hand or something else until they come off entirely. Make sure not to lose any of those little pieces!
- Next comes removing the base itself, which holds up all those parts.
You may have heard people say “go slow” when talking about removing lamps or similar items because these things can break easily if handled too roughly. However, we don’t recommend taking that advice here. Doing so will only result in frustration and wasted time later if something goes wrong while trying.
6. Slide The Base Out Of The Harp
To remove the lamp, you’ll need to slide the base first out of your harp. You can do this by pulling on its tab or by removing the screws from each side of it.
- Once you’ve removed that part, there will be another wire connected to it (the one we mentioned earlier). This wire should be disconnected now as well.
- Now that you’ve gotten rid of both wires, you’re ready for step two – unplugging everything!
- First, remove all four screws holding your shade in place and lift off any remaining parts of it. There might still be some adhesive residue clinging onto some parts after all this time, so don’t worry about getting them wet!
- Next up is removing your switch. Simply pull upwards until it pops out from underneath at an angle like so. Once again, remember not to get any water on anything else while doing this since it may cause damage later on downstream!
- In the case of an adjustable harp, reach through the lamp to remove the cap nuts. Then, lock washers on the base of your socket.
7. Remove The Grill And Shade Ring
To remove the grill and shade ring, use a screwdriver and loosen the finial screw. Next, remove the harp from your lamp. Remove any remaining bulbs or sockets by unscrewing them from their mounting brackets on either side of your light fixture.
8. Loosen Screw With Appropriate Screwdriver
You should loosen the screw with an appropriate screwdriver. Don’t use a screwdriver that is too small or too large for the job. Don’t use a small, sharp blade as it can easily damage your lamp’s socket and wiring. After loosening, the harp will be removed from the lamp.
Frequently Asked Questions
How To Remove A Harp From A Lamp Base?
If the harp is screwed into the base, turn it counterclockwise to loosen it. Then, use pliers to pull it out. When the harp is attached by a swivel joint, use pliers to pry off the ring that holds it in place. In case you can’t get the harp out or if your lamp base has a metal plate over the top of one of its holes, you’ll need to drill out that hole and push the harp through it. You can then attach it to screws or string and hang it on your wall where you want it.
How To Remove A Harp Saddle Lamp?
To remove the harp saddle lamp, you need to disassemble it, which is not an easy task. So, perform every step carefully.
- The first thing you need to do is take off the front cover and remove the two screws holding it in place.
- Once that’s done, you can see where the rest of the parts are located. You will see a plastic ring with four screws on one side and a metal bracket on the other side that holds both parts together.
- You need to put your fingers inside the ring and carefully unscrew all four screws from it so that you can separate them from each other and get access to all of its parts.
Last Speech
Harp removal is not always easy and requires the right tools. The first step is to remove the harp from its base. The best way to remove a harp is by using pliers, as this will give you more control when removing it from an object. Once removed, use a screwdriver or any other similar tool to unscrew the spindle, which will allow easier access into your lamp shade.


