How to Use the Diy Button on Led Lights?
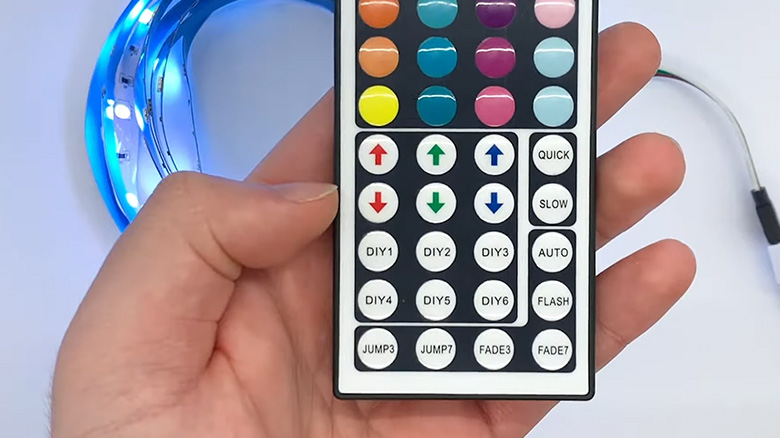
DIY Mode Button Locations for Creating a Color LED Light To display deeper colors, move the up and down arrows. Changing the intensity of the red, green, and blue base colors will result in a different look. When you press “DIY1” one more time, the remote will automatically save your color adjustment in “DIY1” mode. This article will briefly discuss how to use DIY buttons on LED lights.
Is There a Way to Use the DIY Button on Led Lights?
Remotes for LED lights can vary depending on the brand. However, the buttons and usage patterns tend to be similar. Start by installing your LED light in the desired location. Select the remote after installation, and you will find 20 colors available in static mode. These options let you choose any color you like for your light.
A button on the remote indicates the DIY mode. Press the up and down arrows to begin. It will help enhance or decrease a color’s intensity, such as green, red, and blue. This way, the LED light will be illuminated with a rich color hue.
The DIY option on your remote would result in white. This clearly shows that blue, red, and green colors are at their peak. The key is to make the RGB strip completely pixel-free. You will see that the LED light is off. Although it is on, the intensity is zero, so it is still on.
You can then adjust the intensity of the colors by pushing up the buttons as needed. The following steps will help you select or change the desired color:
Firstly, press the DIY button on the remote.
Secondly, Using the remote’s arrow keys, long press them. This method will help you lock in both the intensity and the color.
Finally, press your remote’s DIY button again.
Important Note: You can see the color change when you long-press the remote’s arrow keys. A short press, however, will show you the differences. As a result, something other than the DIY option might work better.
There are usually DIY buttons on RGB remote controllers. By adjusting the number of color settings, you can adjust the intensity of the light. However, if you want a more customized setup, you must use an application-based LED light.
What Is The Best Way to Create DIY Colors Without Using DIY Buttons?
Do you still have the option of turning on the LED light without the remote control or adjusting the light effect? Yes, of course, you can. With the smart LED light, you can now control the light from your mobile phone, turn it on or off, set the color and brightness, adjust the light mode, and even set the timer. It’s all very convenient.
Because it’s a brilliant strip light, you can connect it to WiFi and add it to the mobile app, allowing you to adjust the light effect through the app using the same remote as the ordinary RGB LED light. This app has several fixed scenarios, such as reading, dazzle, music, etc. You can set the corresponding light effect in each scenario, equivalent to the remote’s DIY mode.
Frequently Asked Questions
What Do the DIY Buttons on LED Lights Do?
You can create custom colors with the “DIY” buttons on the controller. Using the color-coded arrows on the controller, you can change the color to whatever you want when you press one of the six DIY buttons!
How Do I Control Your LED Lights If I Lost the Remote?
Most lighting remotes and adapters can be found online, so you shouldn’t have much trouble replacing yours. If/when you lose your remote, you can also download an LED light app for your smartphone.
Conclusion
On the remote control, you’ll find DIY1, DIY2, and DIY6, which means you can set up six DIY modes. The RGB palettes (RED, GREEN, and BLUE) can be adjusted by pressing and holding the right and left arrow keys until you set the color you want. You can save the chosen color in DIY1 mode by pressing “DIY1” again.